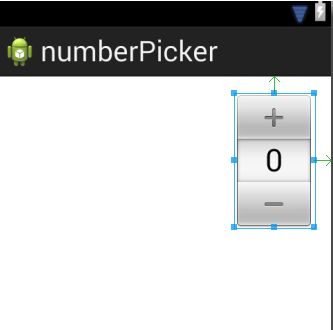
For my E Commerce application that I have been working on, I wanted to use the NumberPicker as it is quite a neat widget. I had to implement in my Shopping Cart where a ListView will be display the items that I have added in the Cart. Within each row of the ListView I had to add a NumberPicker so that the users can change the quantity of the product in the Cart.
So I added the NumberPicker to my layout using the following code.
By default, the size of the NumberPicker is quite big and is completely unusable within a ListView row. So I used the scaling parameters to reduce the size of the NumberPicker.
So I added the NumberPicker to my layout using the following code.
<NumberPicker

android:id="@+id/numberPicker1"
android:layout_width="wrap_content"
android:layout_height="wrap_content"
android:layout_alignParentRight="true"
android:layout_alignParentTop="true" />
By default, the size of the NumberPicker is quite big and is completely unusable within a ListView row. So I used the scaling parameters to reduce the size of the NumberPicker.
        android:scaleX=".5"
        android:scaleY=".5"
This would scale the size to 50%. However, this is where the problem starts. As you can see, the scaling happens and the size of the widget becomes smaller. But the padding appears around the widget (as can be seen from the blue rectangle). The problem is, there is no way for us to remove this padding. That is why, even though the widget scales, but it is useless for all practical purposes. Imagine having a ListView whose every row has a width as shown below.
I did a lots of research, but failed. Hence had to revert back to good old 2 buttons and a text box in between. Or if your quantity options are not very big, I would recommend you can even use a Spinner to select the quantity.


No comments:
Post a Comment